Print direction between panels
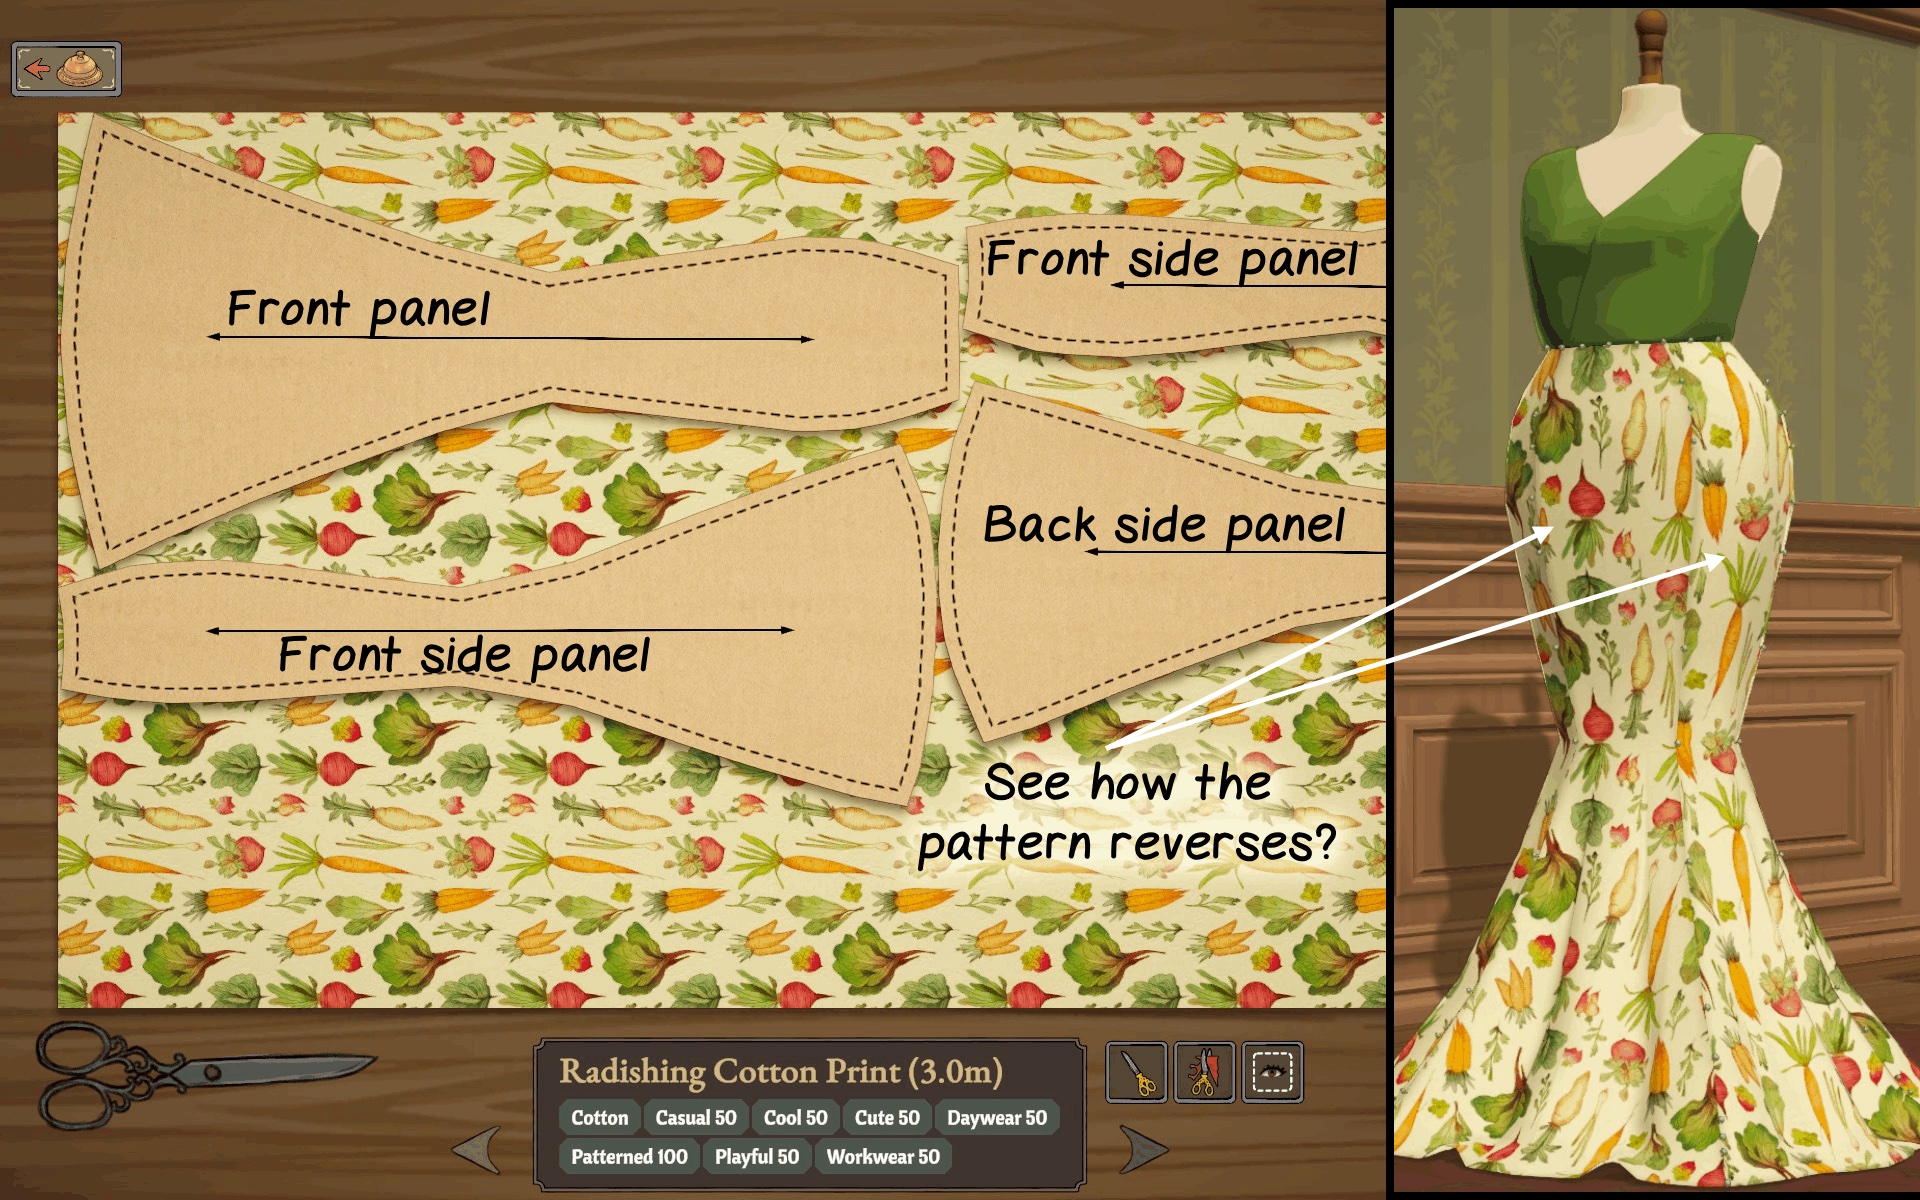
A directional print follows each pattern piece's orientation. The documented example lays a vegetable-print cotton out piece by piece: front panel, front side panel, back side panel — and on the finished dress the print runs in visibly different directions where the panels meet. If you want the motif to flow one way, decide it while the pieces are still on the table.
Grain versus the look
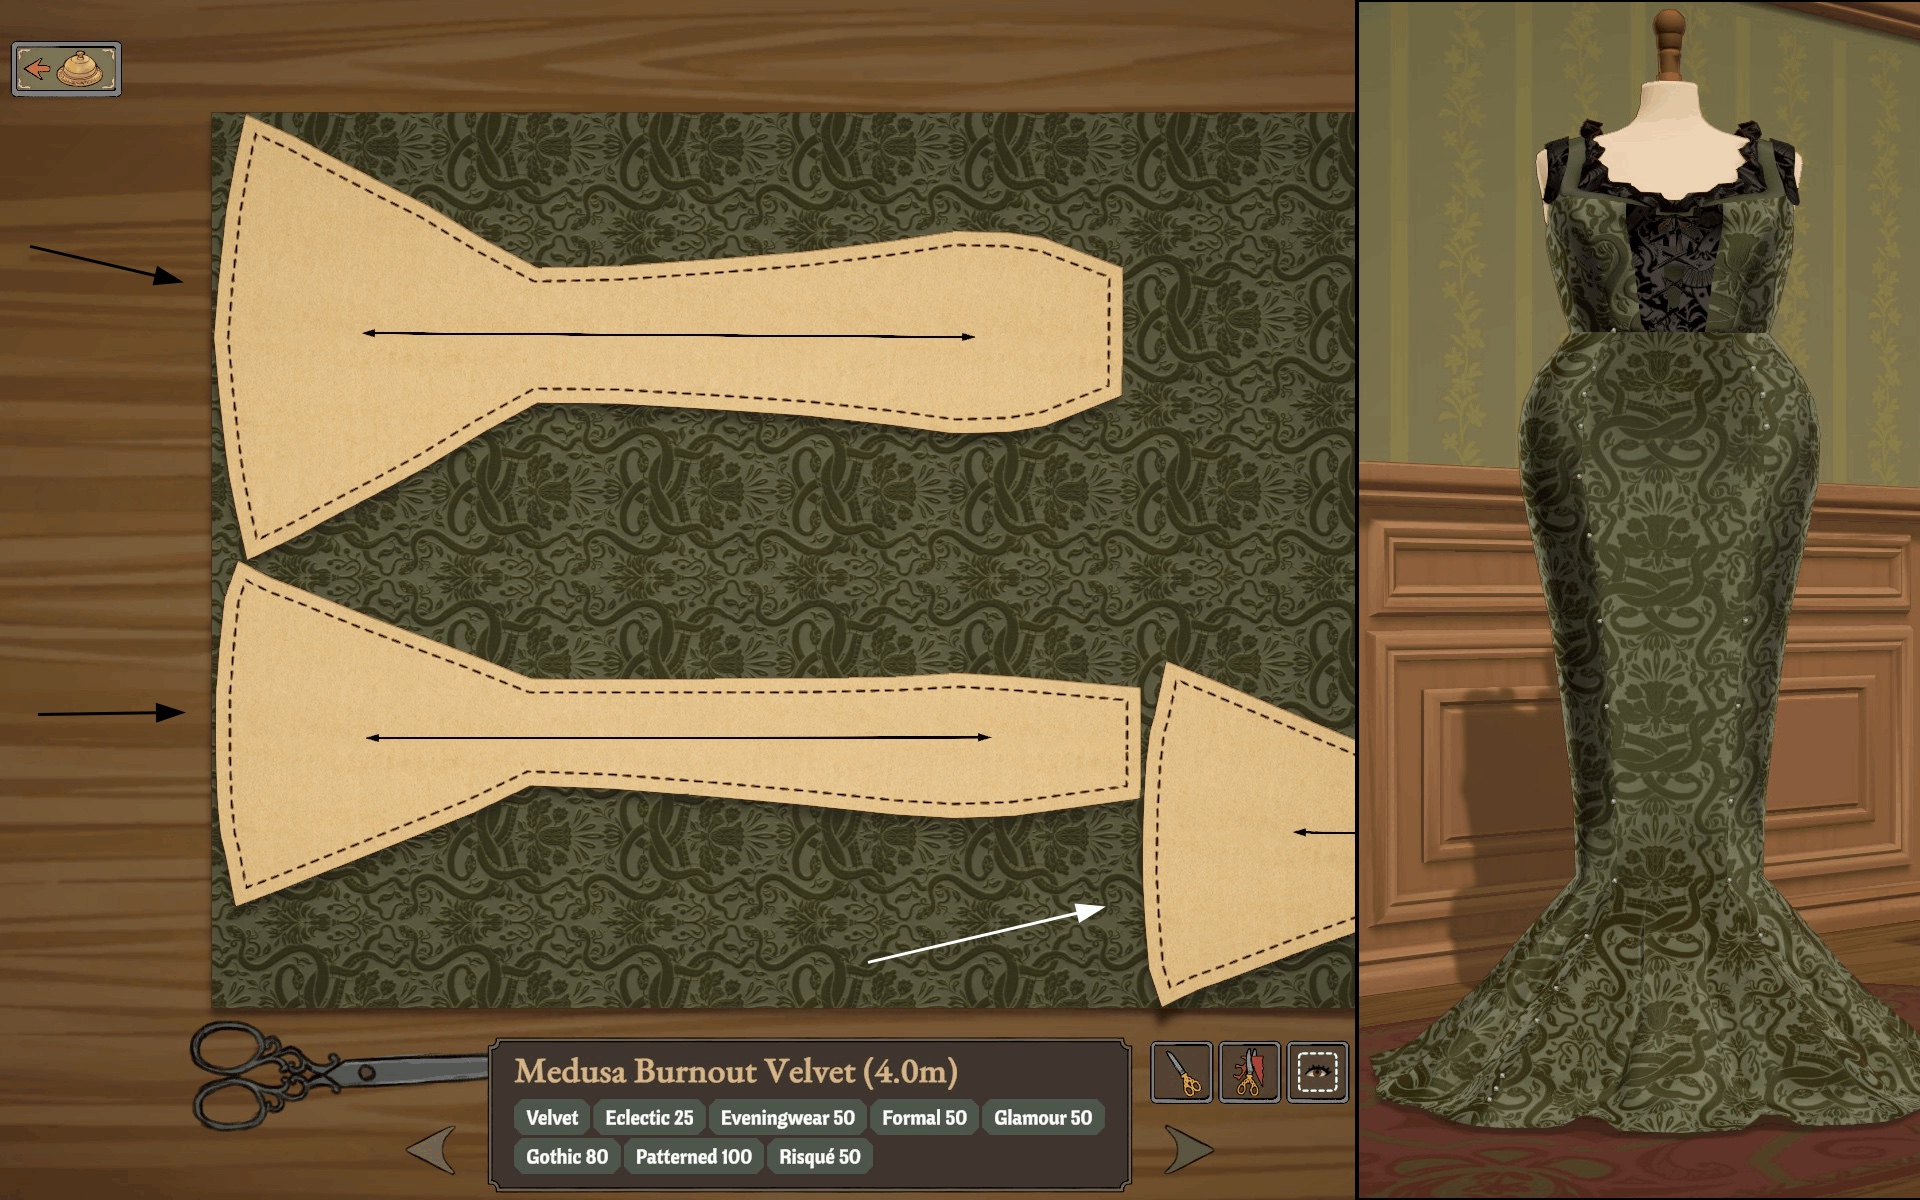
Every piece also carries a grain arrow, and the quality chain wants it straight — the cutting guide covers that check. For looks, the same arrow decides which way a gradient or pile runs on the body. The documented trade-off: you can rotate a piece for the visual direction you want and accept the quality cost that comes with it. That is a deliberate choice to make per piece, not an accident to discover at the sewing machine.
Camera: zoom, pan, tilt
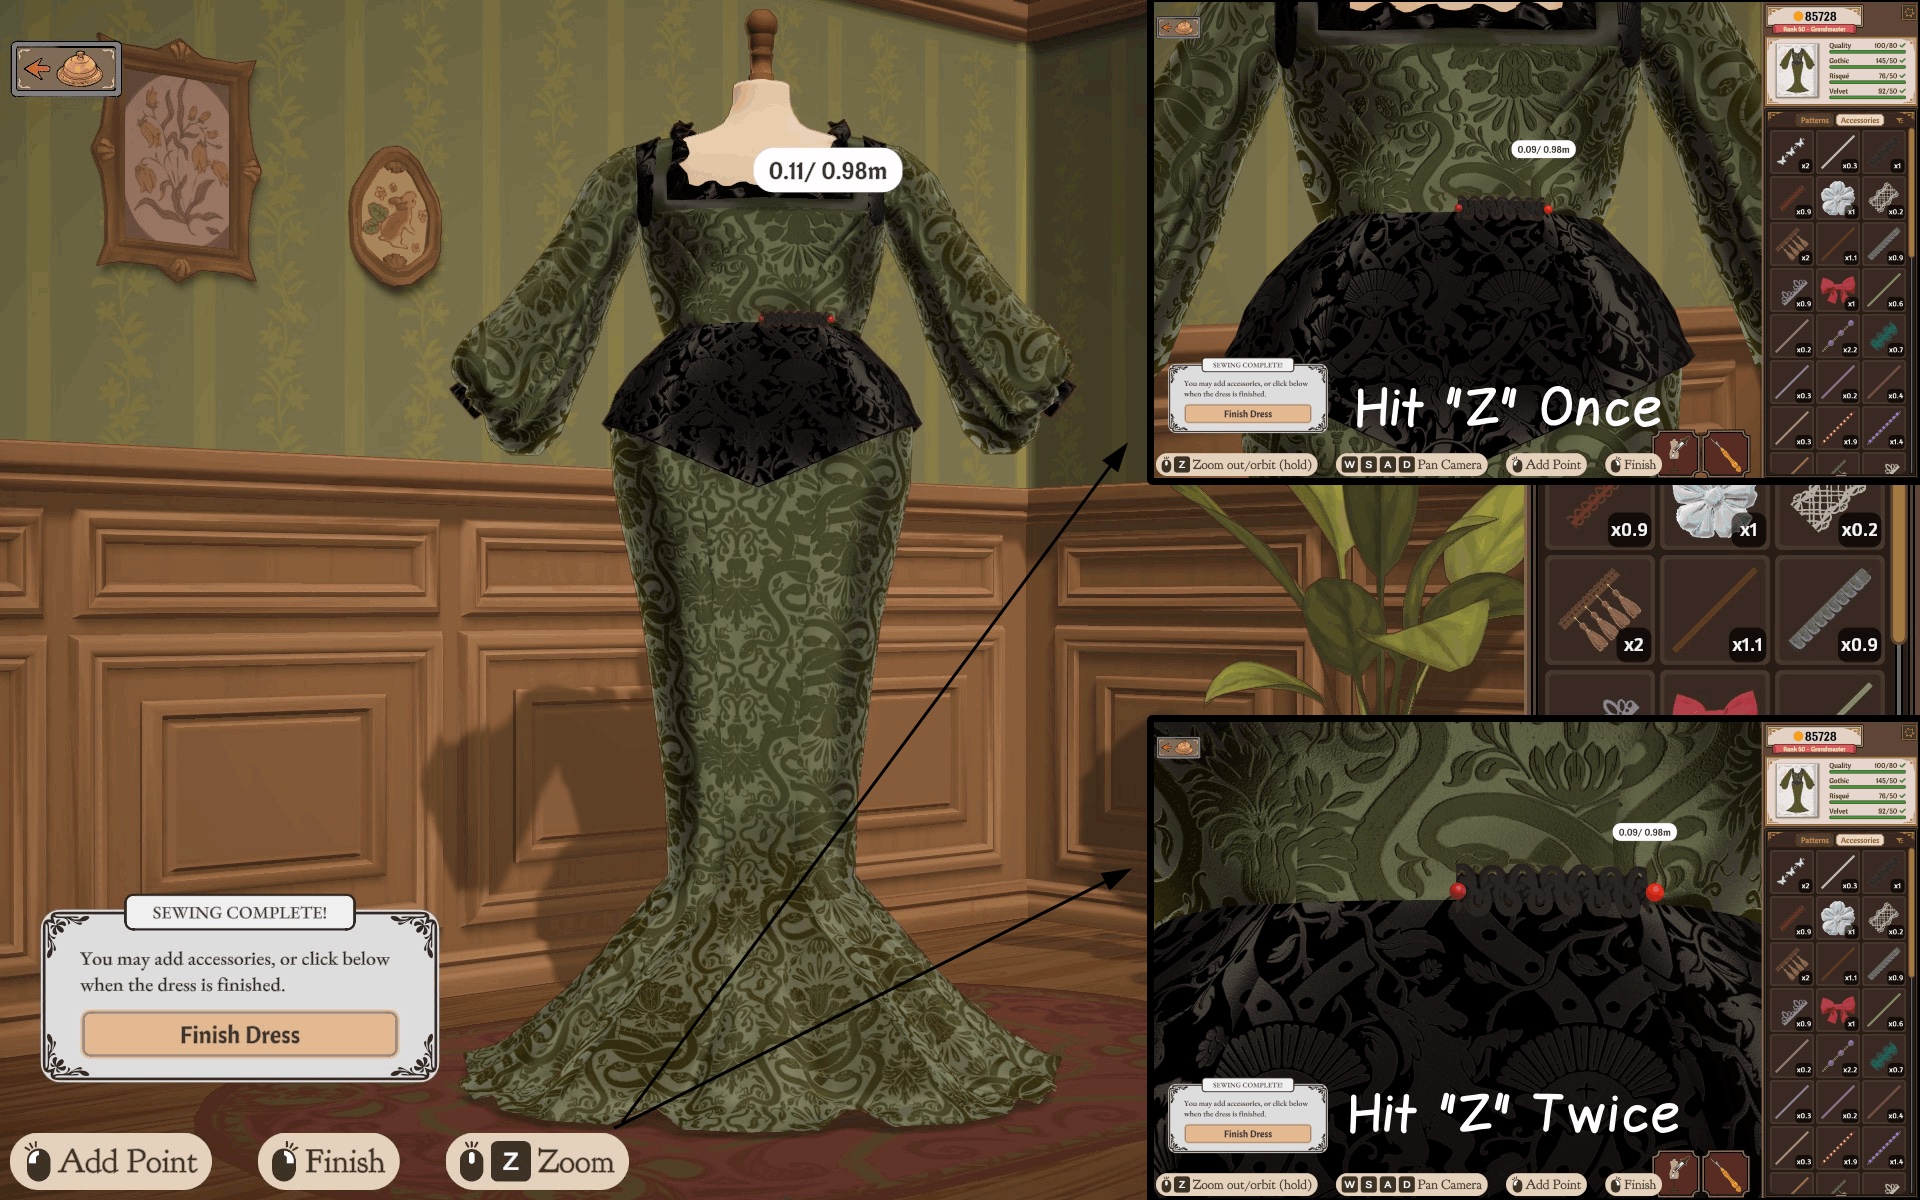
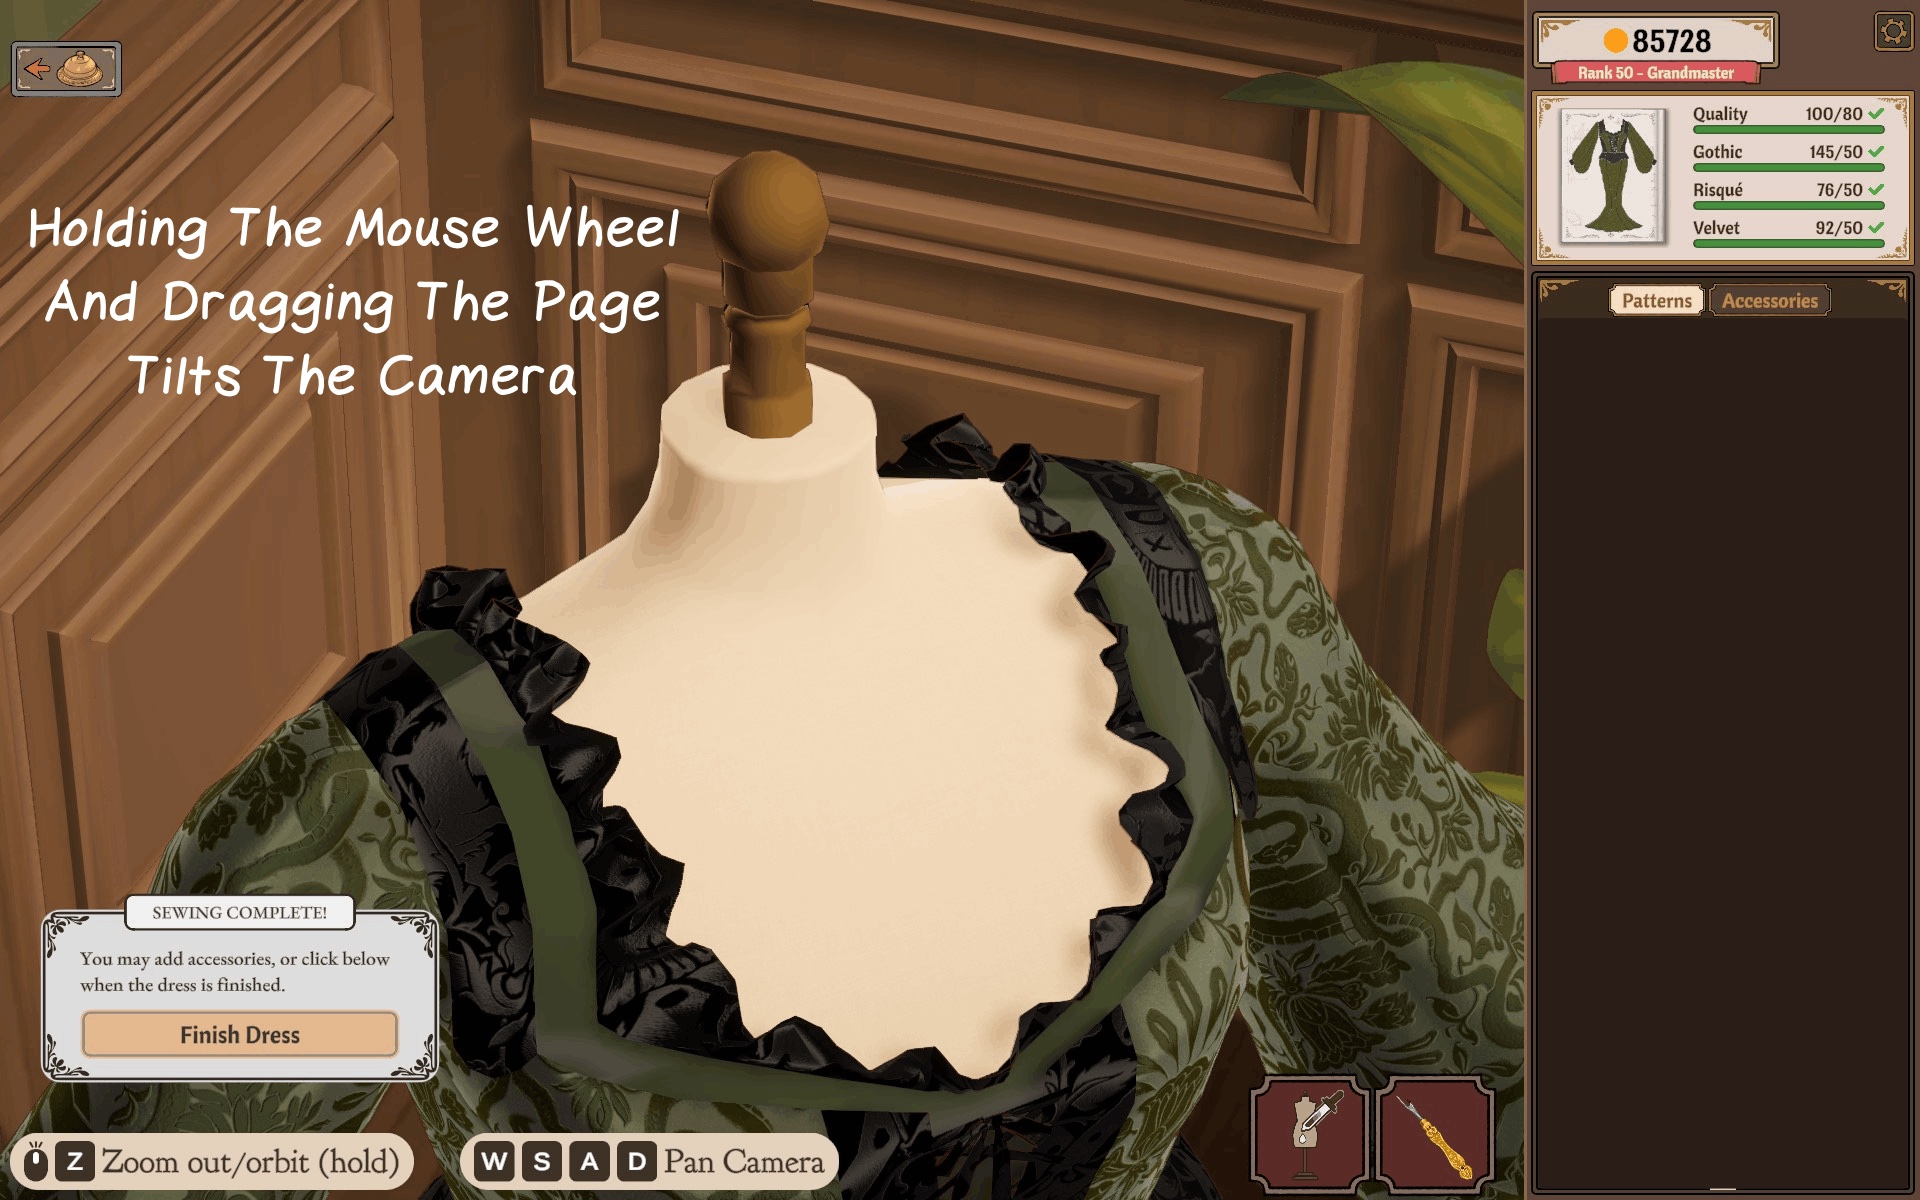
The documented camera controls: Z zooms (repeated presses step through zoom levels), WASD pans, and holding the mouse wheel while dragging tilts the camera. Zooming in is also how you place small accessories accurately — the accessory grid opens beside the dress while you work.
Accessory placement
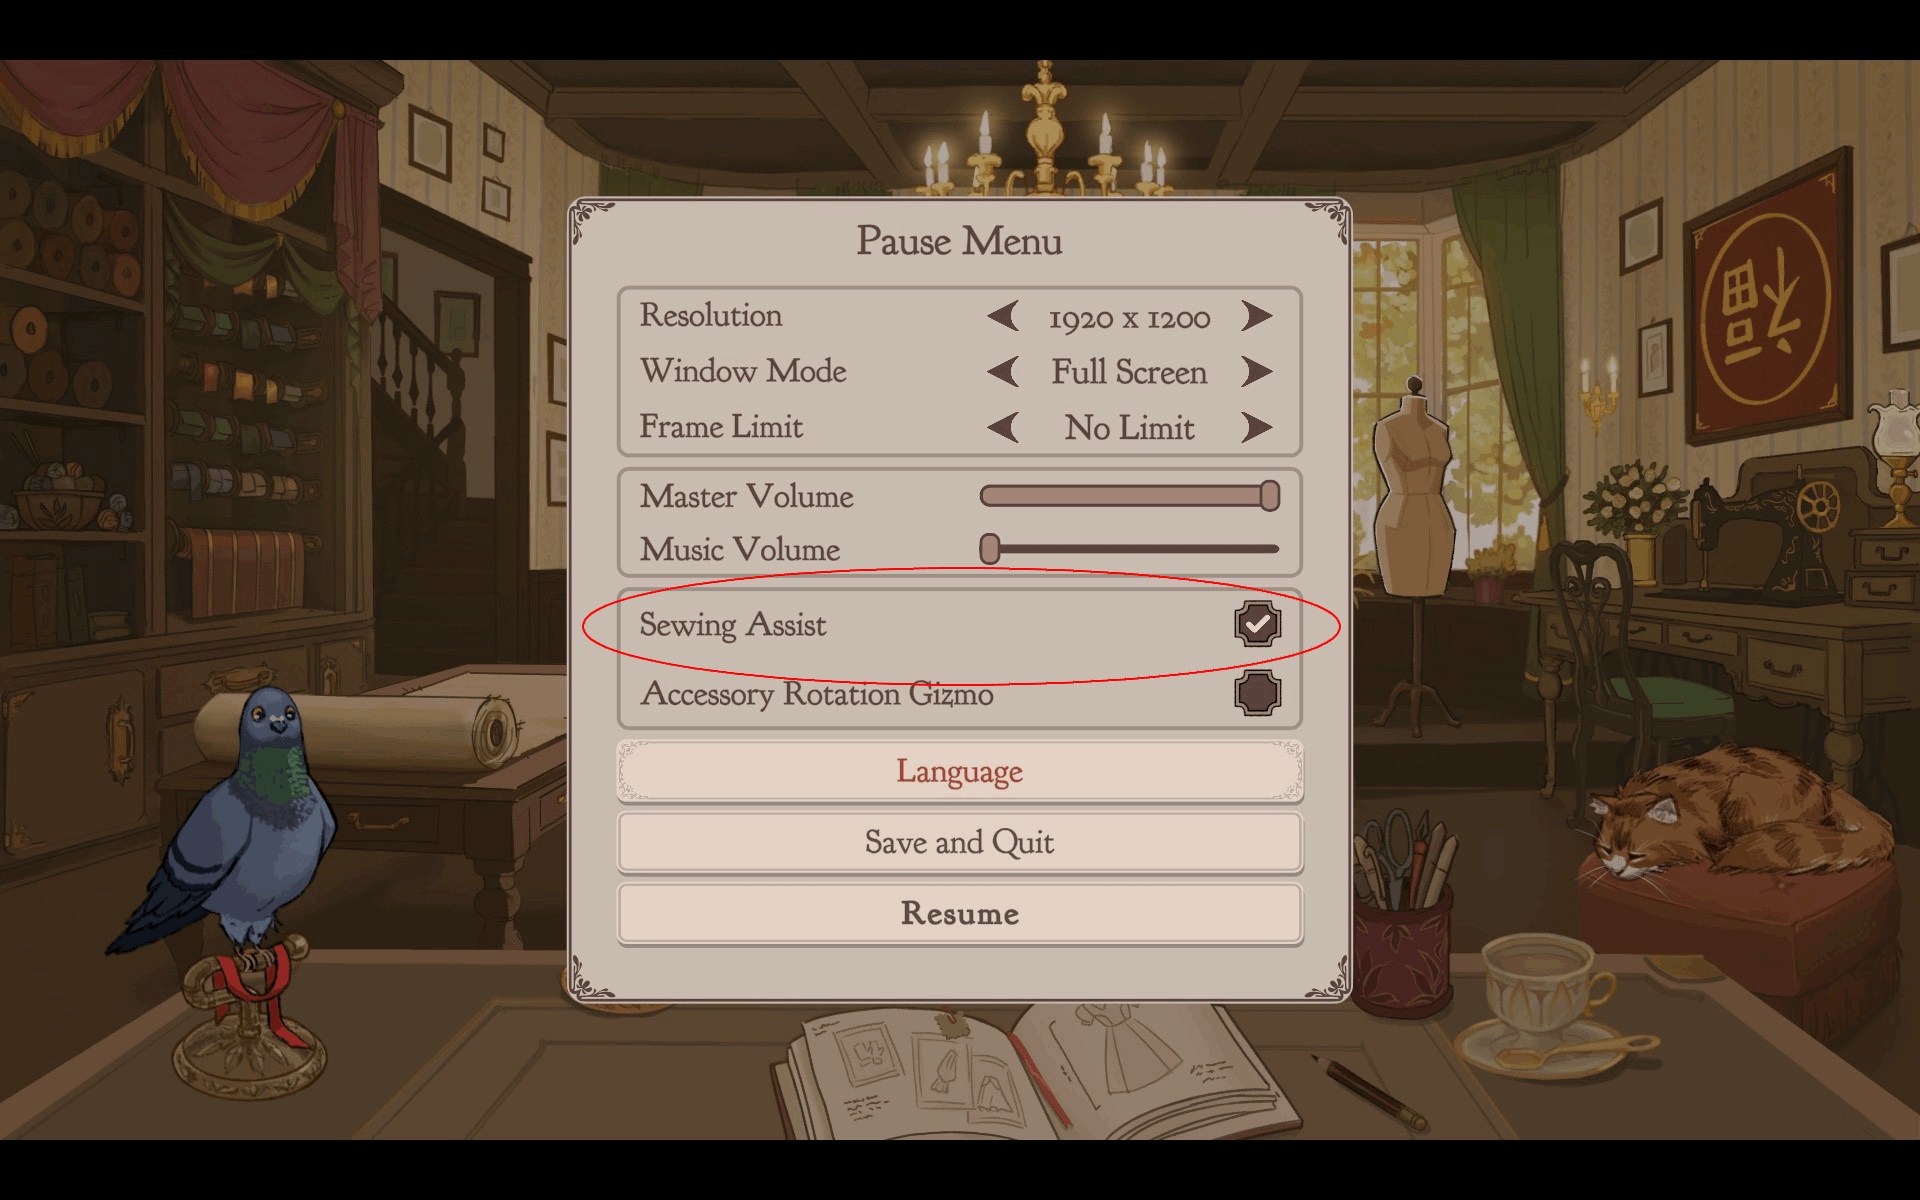
Two keys do the heavy lifting at the accessories stage: Q/E rotate the accessory you are placing, and Shift keeps placing the same item — or duplicates one already on the dress — which is how the achievements guide suggests filling large counts without re-opening the inventory each time. For rotation trouble, the pause menu has an Accessory Rotation Gizmo toggle (and a Sewing Assist toggle beside it) documented in the settings screen.
What this workflow does not cover
The documented authors stop at these basics: no verified guide exists here for advanced per-axis accessory transforms, mirroring, or fixing feathers that clip through fabric. One author says outright he never mastered the advanced embellishment controls — this page reflects that honesty rather than inventing steps. For the photo side, the completion screen offers environment, light and viewfinder controls; a full photo-export walkthrough is beyond the documented material.